设计简介
摘 要
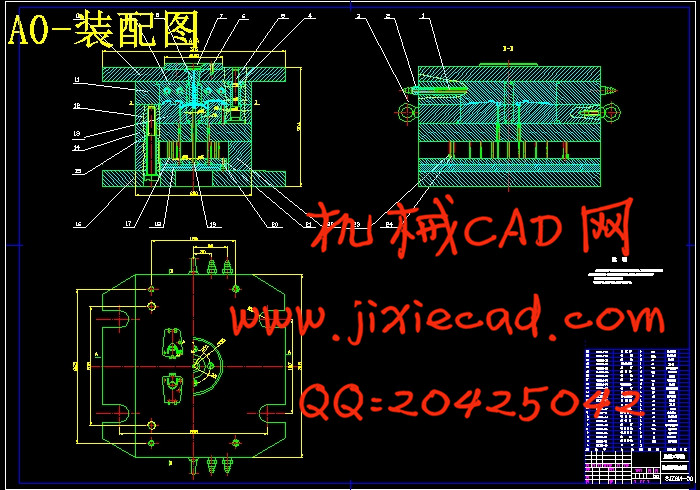
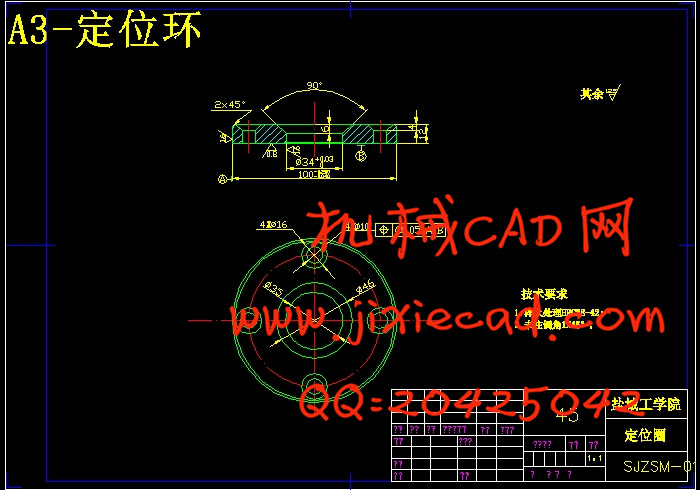
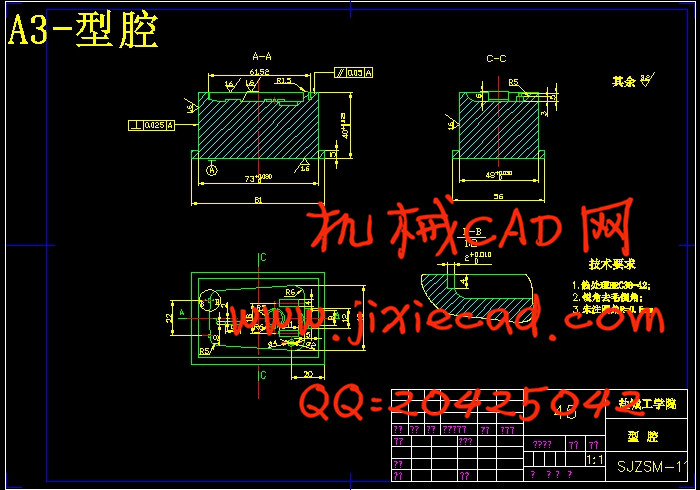
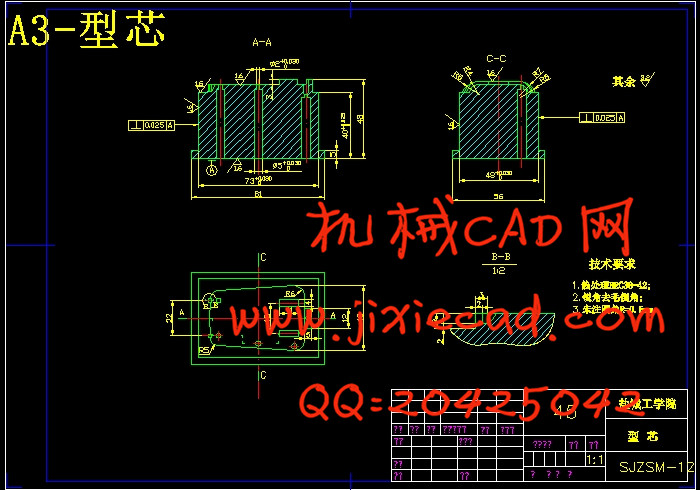
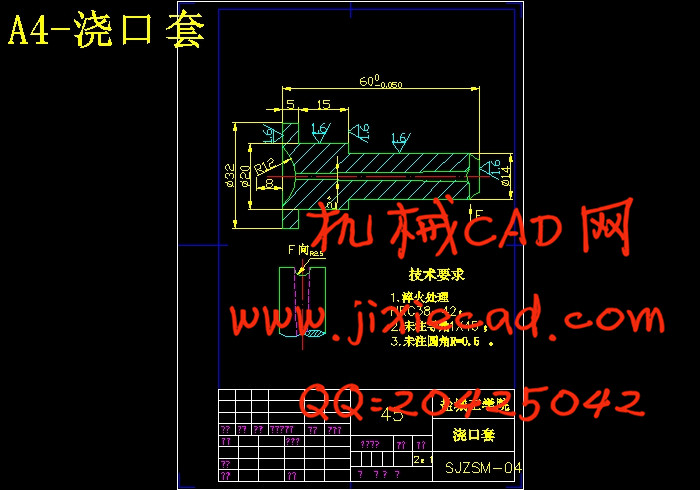
本文就手机后盖注塑模的设计过程作了详细的介绍,从制品的测绘、注塑机的选取到分型面的确定、模架结构的确定,每一步均作了详细地说明和精确到计算,特别是对型腔数、浇道结构、型腔、型芯尺寸等重要部分的确定,文中作了重点论述。通过本文读者可了解注塑模设计的基本步骤,掌握从模具材料的选取到模架结构的确定的基本方法。文章按注塑模设计的基本步骤层层展开、步步深入,在设计好模具结构的基础上,采用AutoCAD、Pro/E两种造型方法对各零件造型,使设计结果更加清晰、明了。同时,作者还对型腔进行工艺分析,编写了工艺过程卡片,并在Mastercam环境下进行了仿真加工,实现了模具的制造。文章重点突出、结构分明,前半部分重点介绍注塑模结构的选取及各零件尺寸的确定,后面内容重点讲述了造型及仿真加工,使读者很容易理解,可作为注塑模初学者的参考资料。
关键词: 注塑模 模架 注射机 仿真加工
Keyword: The note moulds the shelf injecting machine of mould Emulation processing
目 录
0.前言 ┈┈┈┈┈┈┈┈┈┈┈┈┈┈┈┈┈┈┈┈┈┈┈┈┈┈┈┈ 1
1.1 注塑模基本结构方案的比较与选取 ┈┈┈┈┈┈┈┈┈┈┈┈┈ 3
1.2 制品的测绘 ┈┈┈┈┈┈┈┈┈┈┈┈┈┈┈┈┈┈┈┈┈┈┈┈ 3
1.2.1 制品材料的工艺分析 ┈┈┈┈┈┈┈┈┈┈┈┈┈┈┈┈┈┈ 3
1.2.2 制品测绘 ┈┈┈┈┈┈┈┈┈┈┈┈┈┈┈┈┈┈┈┈┈┈┈ 3
1.2 注塑机的选择 ┈┈┈┈┈┈┈┈┈┈┈┈┈┈┈┈┈┈┈┈┈┈ 4
1.2.1 注射量 ┈┈┈┈┈┈┈┈┈┈┈┈┈┈┈┈┈┈┈┈┈┈┈┈ 4
1.2.2 锁模力 ┈┈┈┈┈┈┈┈┈┈┈┈┈┈┈┈┈┈┈┈┈┈┈┈ 5
1.2.3 注射能力的校核 ┈┈┈┈┈┈┈┈┈┈┈┈┈┈┈┈┈┈┈┈ 5
1.3 分型面的选定 ┈┈┈┈┈┈┈┈┈┈┈┈┈┈┈┈┈┈┈┈┈┈ 6
1.3.1 留模方式 ┈┈┈┈┈┈┈┈┈┈┈┈┈┈┈┈┈┈┈┈┈┈┈┈ 6
1.3.2 塑件的脱模斜度 ┈┈┈┈┈┈┈┈┈┈┈┈┈┈┈┈┈┈┈┈┈ 7
1.4 制品的收缩率 ┈┈┈┈┈┈┈┈┈┈┈┈┈┈┈┈┈┈┈┈┈┈ 7
1.5 卡钩的结构设计 ┈┈┈┈┈┈┈┈┈┈┈┈┈┈┈┈┈┈┈┈┈ 7
1.6 脱模斜度的设计 ┈┈┈┈┈┈┈┈┈┈┈┈┈┈┈┈┈┈┈┈┈ 7
1.7 型腔数的确定 ┈┈┈┈┈┈┈┈┈┈┈┈┈┈┈┈┈┈┈┈┈┈ 8
2. 注塑模结构设计 ┈┈┈┈┈┈┈┈┈┈┈┈┈┈┈┈┈┈┈┈┈ 9
2.1 模具材料的选用 ┈┈┈┈┈┈┈┈┈┈┈┈┈┈┈┈┈┈┈┈┈ 9
2.2 浇注系统的设计 ┈┈┈┈┈┈┈┈┈┈┈┈┈┈┈┈┈┈┈┈┈ 9
2.2.1 主浇道的设计 ┈┈┈┈┈┈┈┈┈┈┈┈┈┈┈┈┈┈┈┈┈┈ 9
2.2.2 分浇道的设计 ┈┈┈┈┈┈┈┈┈┈┈┈┈┈┈┈┈┈┈┈┈┈ 10
2.2.3 浇口的设计 ┈┈┈┈┈┈┈┈┈┈┈┈┈┈┈┈┈┈┈┈┈┈┈ 11
2.2 冷料穴和拉料杆的设计 ┈┈┈┈┈┈┈┈┈┈┈┈┈┈┈┈┈┈ 11
2.3 型腔的设计 ┈┈┈┈┈┈┈┈┈┈┈┈┈┈┈┈┈┈┈┈┈┈ 11
2.4 成型零件工作尺寸的确定 ┈┈┈┈┈┈┈┈┈┈┈┈┈┈┈┈┈ 12
2.4.1 型腔内径尺寸计算 ┈┈┈┈┈┈┈┈┈┈┈┈┈┈┈┈┈┈┈┈ 12
2.4.2 型腔外径尺寸计算 ┈┈┈┈┈┈┈┈┈┈┈┈┈┈┈┈┈┈┈┈ 12
2.4.3 型腔深度尺寸计算 ┈┈┈┈┈┈┈┈┈┈┈┈┈┈┈┈┈┈┈┈ 13
2.4.4 型芯高度尺寸计算 ┈┈┈┈┈┈┈┈┈┈┈┈┈┈┈┈┈┈┈┈ 13
2.4.5 成型零件型腔壁厚的计算 ┈┈┈┈┈┈┈┈┈┈┈┈┈┈┈┈┈ 13
2.4.6 底板厚度的计算 ┈┈┈┈┈┈┈┈┈┈┈┈┈┈┈┈┈┈┈┈┈ 14
2.5 模架的计算 ┈┈┈┈┈┈┈┈┈┈┈┈┈┈┈┈┈┈┈┈┈┈┈ 16
2.6 定模冷却水道的设计 ┈┈┈┈┈┈┈┈┈┈┈┈┈┈┈┈┈┈┈ 17
2.7 顶出方式的设计 ┈┈┈┈┈┈┈┈┈┈┈┈┈┈┈┈┈┈┈┈┈ 17
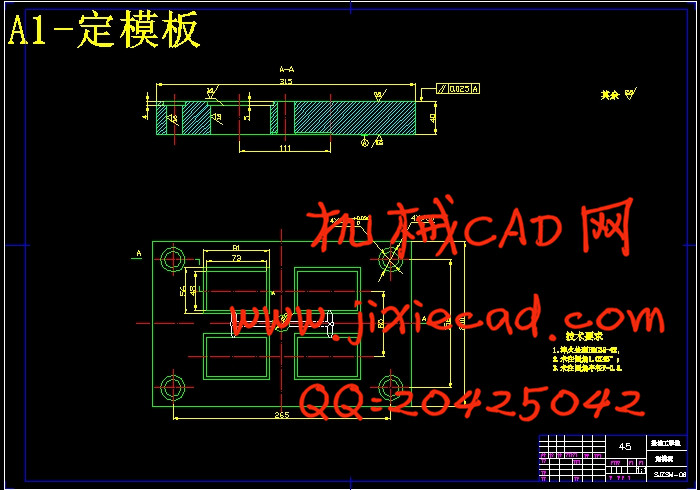
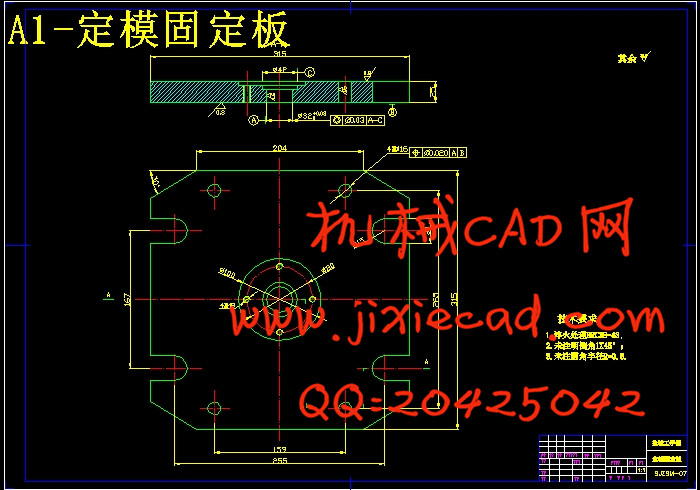
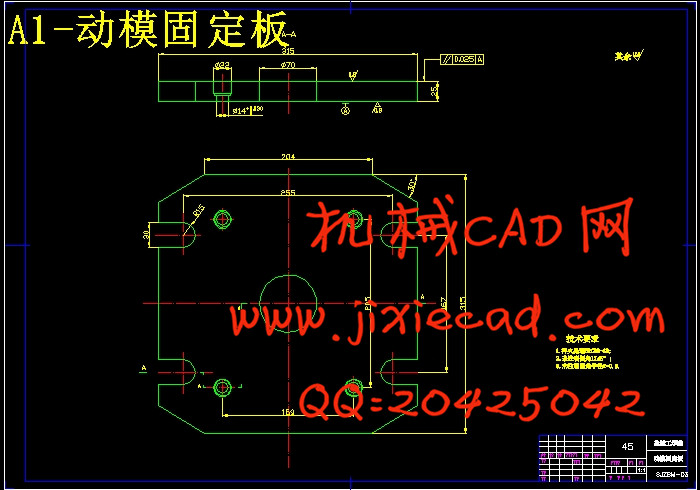
3. 绘制注塑模装配图及零件图 ┈┈┈┈┈┈┈┈┈┈┈┈┈┈┈┈ 19
4. 型腔零件的工艺分析 ┈┈┈┈┈┈┈┈┈┈┈┈┈┈┈┈┈┈┈ 20
4.1 零件的工艺审查 ┈┈┈┈┈┈┈┈┈┈┈┈┈┈┈┈┈┈┈┈┈┈ 20
4.2 毛坯的选择 ┈┈┈┈┈┈┈┈┈┈┈┈┈┈┈┈┈┈┈┈┈┈┈┈ 20
4.3 基准的选择 ┈┈┈┈┈┈┈┈┈┈┈┈┈┈┈┈┈┈┈┈┈┈┈┈ 20
4.4 拟订机械加工工艺路线 ┈┈┈┈┈┈┈┈┈┈┈┈┈┈┈┈┈┈┈ 20
4.5 仿真加工 ┈┈┈┈┈┈┈┈┈┈┈┈┈┈┈┈┈┈┈┈┈┈┈┈┈ 21
4.6 小结 ┈┈┈┈┈┈┈┈┈┈┈┈┈┈┈┈┈┈┈┈┈┈┈┈┈┈┈ 22
致谢 ┈┈┈┈┈┈┈┈┈┈┈┈┈┈┈┈┈┈┈┈┈┈┈┈┈┈┈ 23
参考文献 ┈┈┈┈┈┈┈┈┈┈┈┈┈┈┈┈┈┈┈┈┈┈┈┈┈ 24
附件清单 ┈┈┈┈┈┈┈┈┈┈┈┈┈┈┈┈┈┈┈┈┈┈┈┈┈ 25
本文就手机后盖注塑模的设计过程作了详细的介绍,从制品的测绘、注塑机的选取到分型面的确定、模架结构的确定,每一步均作了详细地说明和精确到计算,特别是对型腔数、浇道结构、型腔、型芯尺寸等重要部分的确定,文中作了重点论述。通过本文读者可了解注塑模设计的基本步骤,掌握从模具材料的选取到模架结构的确定的基本方法。文章按注塑模设计的基本步骤层层展开、步步深入,在设计好模具结构的基础上,采用AutoCAD、Pro/E两种造型方法对各零件造型,使设计结果更加清晰、明了。同时,作者还对型腔进行工艺分析,编写了工艺过程卡片,并在Mastercam环境下进行了仿真加工,实现了模具的制造。文章重点突出、结构分明,前半部分重点介绍注塑模结构的选取及各零件尺寸的确定,后面内容重点讲述了造型及仿真加工,使读者很容易理解,可作为注塑模初学者的参考资料。
关键词: 注塑模 模架 注射机 仿真加工
Abstract
Pluck and want this text make detailed introduction on cell-phone back cover design process that note moulded, From survey and drawing, to choose sureness, mould shelf, Every do and prove and not so accurate that calculate in detail , count, water dishes of structure, type, type core size,etc. important sureness of part to type, Have described especially in the article. Reader can understand note mould basic measure that design, grasp and choose to mould shelf from mould material through this text. Article mould according to note basic measure that design launch, deepen step by step ring upon ring, On the basis of designing the good mould structure, adopt AutoCAD, Pro/E two modelling method to every part modelling, Make and design result clearer, more clear. Besides, author carry on to type craft analyse, have written the course card of craft also, Carry on emulation process, realize the manufacture of the mould under the enviroment of Mastercam. Article stress especially, clearly demarcated structure, the first half part introduce note mould choose and every part sureness of size of structure especially, Following content tell modelling and emulation process, make reader to be very easy to understand especially, Can mould the beginner's reference material as the note.Keyword: The note moulds the shelf injecting machine of mould Emulation processing
目 录
0.前言 ┈┈┈┈┈┈┈┈┈┈┈┈┈┈┈┈┈┈┈┈┈┈┈┈┈┈┈┈ 1
1.1 注塑模基本结构方案的比较与选取 ┈┈┈┈┈┈┈┈┈┈┈┈┈ 3
1.2 制品的测绘 ┈┈┈┈┈┈┈┈┈┈┈┈┈┈┈┈┈┈┈┈┈┈┈┈ 3
1.2.1 制品材料的工艺分析 ┈┈┈┈┈┈┈┈┈┈┈┈┈┈┈┈┈┈ 3
1.2.2 制品测绘 ┈┈┈┈┈┈┈┈┈┈┈┈┈┈┈┈┈┈┈┈┈┈┈ 3
1.2 注塑机的选择 ┈┈┈┈┈┈┈┈┈┈┈┈┈┈┈┈┈┈┈┈┈┈ 4
1.2.1 注射量 ┈┈┈┈┈┈┈┈┈┈┈┈┈┈┈┈┈┈┈┈┈┈┈┈ 4
1.2.2 锁模力 ┈┈┈┈┈┈┈┈┈┈┈┈┈┈┈┈┈┈┈┈┈┈┈┈ 5
1.2.3 注射能力的校核 ┈┈┈┈┈┈┈┈┈┈┈┈┈┈┈┈┈┈┈┈ 5
1.3 分型面的选定 ┈┈┈┈┈┈┈┈┈┈┈┈┈┈┈┈┈┈┈┈┈┈ 6
1.3.1 留模方式 ┈┈┈┈┈┈┈┈┈┈┈┈┈┈┈┈┈┈┈┈┈┈┈┈ 6
1.3.2 塑件的脱模斜度 ┈┈┈┈┈┈┈┈┈┈┈┈┈┈┈┈┈┈┈┈┈ 7
1.4 制品的收缩率 ┈┈┈┈┈┈┈┈┈┈┈┈┈┈┈┈┈┈┈┈┈┈ 7
1.5 卡钩的结构设计 ┈┈┈┈┈┈┈┈┈┈┈┈┈┈┈┈┈┈┈┈┈ 7
1.6 脱模斜度的设计 ┈┈┈┈┈┈┈┈┈┈┈┈┈┈┈┈┈┈┈┈┈ 7
1.7 型腔数的确定 ┈┈┈┈┈┈┈┈┈┈┈┈┈┈┈┈┈┈┈┈┈┈ 8
2. 注塑模结构设计 ┈┈┈┈┈┈┈┈┈┈┈┈┈┈┈┈┈┈┈┈┈ 9
2.1 模具材料的选用 ┈┈┈┈┈┈┈┈┈┈┈┈┈┈┈┈┈┈┈┈┈ 9
2.2 浇注系统的设计 ┈┈┈┈┈┈┈┈┈┈┈┈┈┈┈┈┈┈┈┈┈ 9
2.2.1 主浇道的设计 ┈┈┈┈┈┈┈┈┈┈┈┈┈┈┈┈┈┈┈┈┈┈ 9
2.2.2 分浇道的设计 ┈┈┈┈┈┈┈┈┈┈┈┈┈┈┈┈┈┈┈┈┈┈ 10
2.2.3 浇口的设计 ┈┈┈┈┈┈┈┈┈┈┈┈┈┈┈┈┈┈┈┈┈┈┈ 11
2.2 冷料穴和拉料杆的设计 ┈┈┈┈┈┈┈┈┈┈┈┈┈┈┈┈┈┈ 11
2.3 型腔的设计 ┈┈┈┈┈┈┈┈┈┈┈┈┈┈┈┈┈┈┈┈┈┈ 11
2.4 成型零件工作尺寸的确定 ┈┈┈┈┈┈┈┈┈┈┈┈┈┈┈┈┈ 12
2.4.1 型腔内径尺寸计算 ┈┈┈┈┈┈┈┈┈┈┈┈┈┈┈┈┈┈┈┈ 12
2.4.2 型腔外径尺寸计算 ┈┈┈┈┈┈┈┈┈┈┈┈┈┈┈┈┈┈┈┈ 12
2.4.3 型腔深度尺寸计算 ┈┈┈┈┈┈┈┈┈┈┈┈┈┈┈┈┈┈┈┈ 13
2.4.4 型芯高度尺寸计算 ┈┈┈┈┈┈┈┈┈┈┈┈┈┈┈┈┈┈┈┈ 13
2.4.5 成型零件型腔壁厚的计算 ┈┈┈┈┈┈┈┈┈┈┈┈┈┈┈┈┈ 13
2.4.6 底板厚度的计算 ┈┈┈┈┈┈┈┈┈┈┈┈┈┈┈┈┈┈┈┈┈ 14
2.5 模架的计算 ┈┈┈┈┈┈┈┈┈┈┈┈┈┈┈┈┈┈┈┈┈┈┈ 16
2.6 定模冷却水道的设计 ┈┈┈┈┈┈┈┈┈┈┈┈┈┈┈┈┈┈┈ 17
2.7 顶出方式的设计 ┈┈┈┈┈┈┈┈┈┈┈┈┈┈┈┈┈┈┈┈┈ 17
3. 绘制注塑模装配图及零件图 ┈┈┈┈┈┈┈┈┈┈┈┈┈┈┈┈ 19
4. 型腔零件的工艺分析 ┈┈┈┈┈┈┈┈┈┈┈┈┈┈┈┈┈┈┈ 20
4.1 零件的工艺审查 ┈┈┈┈┈┈┈┈┈┈┈┈┈┈┈┈┈┈┈┈┈┈ 20
4.2 毛坯的选择 ┈┈┈┈┈┈┈┈┈┈┈┈┈┈┈┈┈┈┈┈┈┈┈┈ 20
4.3 基准的选择 ┈┈┈┈┈┈┈┈┈┈┈┈┈┈┈┈┈┈┈┈┈┈┈┈ 20
4.4 拟订机械加工工艺路线 ┈┈┈┈┈┈┈┈┈┈┈┈┈┈┈┈┈┈┈ 20
4.5 仿真加工 ┈┈┈┈┈┈┈┈┈┈┈┈┈┈┈┈┈┈┈┈┈┈┈┈┈ 21
4.6 小结 ┈┈┈┈┈┈┈┈┈┈┈┈┈┈┈┈┈┈┈┈┈┈┈┈┈┈┈ 22
致谢 ┈┈┈┈┈┈┈┈┈┈┈┈┈┈┈┈┈┈┈┈┈┈┈┈┈┈┈ 23
参考文献 ┈┈┈┈┈┈┈┈┈┈┈┈┈┈┈┈┈┈┈┈┈┈┈┈┈ 24
附件清单 ┈┈┈┈┈┈┈┈┈┈┈┈┈┈┈┈┈┈┈┈┈┈┈┈┈ 25


